
Start with RabbitMQ: Create A Chat App
TL;DR
In a world where services are increasingly decoupled and owned by different teams, let's call it microservices, the need for reliable, asynchronous information exchange is necessary. Whether it's due to high load, temporary disruptions, or service unavailability, we need a robust mechanism to ensure data is processed without failures.
In this article, we will get introduced to RabbitMQ, a message broker that is suited for this scenario. It provides reliable message delivery, complete with acknowledgements and the ability to handle undelivered messages due to failures or rejections. It's language-agnostic and comes with robust monitoring capabilities, logging, and message tracing for easy management and troubleshooting.
We're going to learn how RabbitMQ can be used with Python by creating a simple chat application, demonstrating its capabilities in handling asynchronous communication between different applications.
What is RabbitMQ
Imagine you're a developer building a system composed of multiple services, and these services need to communicate with each other. You quickly realize that having these services talk directly to each other can be complex and error-prone. You need a way for them to communicate asynchronously, so they don't have to be available at the same time This is one of the key reasons why you would implement a message broker like RabbitMQ (there are of course alternatives)
Here is a list of the key features:
- Message Queuing: Enables asynchronous communication between distributed systems.
- Publish/Subscribe Model: Supports the publish/subscribe pattern for message distribution.
- Routing and Routing Keys: Allows selective message delivery based on routing keys or patterns.
- Message Acknowledgment: Ensures messages are not lost even if a consumer disconnects.
- Message Durability: Persists messages to disk, surviving broker restarts.
- Clustering and High Availability: Provides fault tolerance and scalability through clustering.
- Administrative UI and Management API: Web-based interface and RESTful API for configuration and monitoring.
- Language Support: Client libraries available for multiple programming languages.
- Dead Letter Exchanges: Handles unroutable messages for further analysis or processing.
- Message Priority: Supports prioritization of messages for processing.
- Message TTL (Time-to-Live): Sets a time limit for message consumption.
- Plugin System: Extends functionality through a plugin architecture. It's possible to add plugins for different protocols, for monitoring, for tracing, and more.
Protocols supported
RabbitMQ supports several protocols suited for messaging. Since we're going to work with Python library called Pika, it will use AMQP 0-9-1, which is the primary protocol used by RabbitMQ.
The Pika library makes it easy to connect, send, and receive messages with RabbitMQ from Python applications. It provides classes for managing connections, channels, exchanges, and queues, as well as for producing and consuming messages.
Here is the list of the protocols supported by RabbitMQ:
-
AMQP 0-9-1: The Advanced Message Queuing Protocol (AMQP) 0-9-1 is the primary protocol supported by RabbitMQ. It's a binary protocol that was designed for robustness and interoperability between different systems and languages.
-
AMQP 1.0: AMQP 1.0 is a different variant of the AMQP and is supported via a plugin. It's important to note that AMQP 0-9-1 and AMQP 1.0 are quite different from each other and not directly compatible.
-
STOMP: The Simple/Streaming Text Oriented Messaging Protocol (STOMP) is a simple text-based protocol supported via a plugin. It provides an interoperable wire format so that STOMP clients can communicate with any STOMP message broker to provide easy and widespread messaging interoperability among many languages, platforms and brokers.
-
MQTT: The MQ Telemetry Transport (MQTT) is a lightweight publish-subscribe protocol designed for Internet of Things (IoT) devices and low-bandwidth, high-latency networks. It is also supported via a plugin.
-
HTTP and WebSockets: RabbitMQ has plugins to support sending and receiving messages over HTTP and WebSockets. These are especially useful for web applications.
Requirements
To follow along this tutorial, you will need the following tools installed on your machine:
- Python 3.11 recommended
- Pika library
- Docker daemon
- rabbitmq:management container image
Installation
Setting Up RabbitMQ with Docker
Before we dive into the Python code, we need to ensure that RabbitMQ is up and running. One of the easiest ways to do this is by using Docker. Docker is a platform that allows us to containerize our applications, making them easy to run across different environments.
If you don't have Docker installed, follow these steps:
-
Install Docker: Docker can be installed on a variety of operating systems, including Windows, macOS, and various distributions of Linux. Visit the official Docker website and download the appropriate Docker Desktop installer for your operating system. Once downloaded, run the installer and follow the on-screen instructions.
-
Verify Docker Installation: To ensure Docker has been installed correctly, open a terminal window and run the command
docker --version. This should display the installed version of Docker.
Now that Docker is installed, we can proceed to run a RabbitMQ instance:
docker run -d --name rabbitmq -p 5672:5672 -p 15672:15672 rabbitmq:management

Unable to find image 'rabbitmq:management' locally
management: Pulling from library/rabbitmq
2378679266ac: Pull complete
cbb6498893d8: Pull complete
27c3e2a73d4e: Pull complete
4998aff6f9b4: Downloading  38.32MB/52.95MB
The 3-management tag indicates that we want the version of RabbitMQ that includes the management plugin, which provides a user-friendly interface for managing our RabbitMQ server.
-
Here's what this command does:
docker run: This tells Docker to run a new container.-d: This flag tells Docker to run the container in detached mode, meaning it runs in the background.--name rabbitmq: This names our container 'rabbitmq' for easier reference.-p 5672:5672 -p 15672:15672: These flags map the ports from the RabbitMQ container to our host machine. Port 5672 is the default port for RabbitMQ, and port 15672 is the default port for the management interface.rabbitmq:3-management: This is the name and tag of the Docker image we want to run.
-
Verify if RabbitMQ is Running: To ensure RabbitMQ is running, you can visit
http://localhost:15672in your web browser. You should see the RabbitMQ management interface. The default login isguestfor both the username and password.
Install Pika library
I recommend you to create a python virtual environment and install Pika library
To install Pika library, run the following in your virtual environment:
pip install pikaRabbitMQ 101
RabbitMQ is a message broker, which is essentially a middleman for handling the communication between different applications.
Think about a post office. When you want to send a message to another application, you can send it to RabbitMQ, which will ensure that the message is delivered.
How does RabbitMQ work
RabbitMQ works by receiving messages from producers (applications that send messages) and routing them to consumers (applications that receive messages). Here's a simple ASCII diagram to illustrate this:
In this diagram, the Producer sends a message to the RabbitMQ Broker, which then sends the message to the Consumer. The arrows represent the direction of message flow. A producer app can of course be a consumer too at same time, which we will see in our chat app project soon.
Exchange Types
RabbitMQ uses exchanges to route messages to queues. There are four types of exchanges in RabbitMQ: direct, topic, headers, and fanout. Each type of exchange routes the message differently based on different criteria.

Direct Exchange
In a direct exchange, messages are routed to the queues by matching the routing key. A routing key is a string identifier specified by the sender. Each queue that is bound to the direct exchange must define a binding key. If the routing key provided by the sender matches the binding key, the message is routed to that queue.
This approach is simple and straightforward, but it doesn't allow for much flexibility. The routing key must precisely match the binding key, limiting the possibilities for complex routing patterns.
Topic Exchange
The topic exchange extends the direct exchange concept, adding more flexibility. In a topic exchange, the routing key is treated as a sequence of words, delimited by a dot ('.'). Similarly, the binding keys follow this same convention. Wildcards can also be included in the binding key to match multiple words.
The two wildcard characters are:
- An asterisk ('*'): Matches exactly one word.
- A hash ('#'): Matches zero or more words.
This exchange type enables a more complex routing mechanism, allowing a single message to be routed to multiple queues in different ways based on the routing key.
Headers Exchange
Unlike direct and topic exchanges that use routing keys, headers exchanges use message headers for routing. It ignores the routing key attribute and instead uses the headers attribute of the message for routing decisions.
The headers exchange allows you to define complex routing logic based on multiple attributes of a message. It can be particularly useful when the routing decision needs to be based on more than just a single attribute.
Fanout Exchange
Fanout exchanges are the simplest type. When a message is sent to a fanout exchange, it copies and routes the message to all queues that are bound to the exchange, completely ignoring the routing key. Essentially, it broadcasts all the messages it receives to all the queues it knows.
This exchange type is ideal for broadcasting messages to multiple consumers. However, it doesn't allow for selective routing where only specific queues should receive a message.
What are bindings?
In RabbitMQ, a binding is like a rule that determines how messages are routed from exchanges to queues. You can think of it as a bridge between the exchange and the queue.
If we use the metaphor of a post office, it's basically like the post office knowing which postbox to send the mail to. We need some rules for that.
Bindings can have a "binding key", which is like an extra label that helps RabbitMQ decide where to route the message. The way the binding key is used depends on the type of exchange (direct, topic, headers, or fanout) which we learned about earlier.
In the diagram below, the Producer sends a message to the Exchange. The Exchange uses the Binding to determine which Queue to route the message to.
Bindings are a crucial part of how RabbitMQ routes messages from producers to consumers. They ensure that every message ends up in the correct queue.

In this diagram, the producer sends a message to the Exchange in the RabbitMQ Broker. The Exchange uses the Binding to determine which Queue to route the message to. The message is then stored in the Queue until the Consumer is ready to process it.
Here is a list of different exchange types:
-
Direct Exchange: In a direct exchange, a message is routed to the queues whose binding key exactly matches the routing key of the message. For example, if the queue is bound to the exchange with the binding key "info", a message published to the exchange with a routing key "info" will be routed to that queue.
-
Topic Exchange: Topic exchanges route messages to queues based on wildcard matches between the routing key and the routing pattern specified in the binding. Keys and bindings in topic exchanges can contain a dot-separated list of words (like "info.server1" or "error.server2"). The star () wildcard can substitute for exactly one word, and the hash (#) can substitute for zero or more words. For example, a message with the routing key "error.server2" would match a queue bound with "error." or "*.server2" or "error.#", among others.
-
Headers Exchange: Headers exchanges use the message header attributes for routing. The headers exchange ignores the routing key attribute. Instead, the attributes used for routing are taken from the headers attribute. A message is considered matching if the value of the header equals the value specified upon binding.
-
Fanout Exchange: A fanout exchange routes messages to all of the queues that are bound to it. The routing keys and bindings play no role in this exchange type. If N queues are bound to a fanout exchange, when a new message is published to that exchange a copy of the message is delivered to all N queues. Fanout exchanges are ideal for the broadcast routing of messages.
Each of these exchange types serves different purposes and the choice of exchange type depends on the use case.
Build a simple Chat App
It's time to work on a simple project to better understand how RabbitMQ really works.
Business Requirement
A company aims to develop a real-time chat application that enables users to exchange messages with each other. The application should guarantee reliable and efficient message delivery between users. To achieve this, the company has decided to utilize RabbitMQ as the messaging platform, due to its robust features and support for asynchronous communication. Importantly, if messages are not delivered due to an outage (or any other reason) of the consumer app, they should be able to be delivered once the app is back up and running.
RabbitMQ As A Message Broker
In our chat application, RabbitMQ acts as a message broker that facilitates the communication between different instances of the chat application (in our case, Jean and Pierre). Each instance of the chat application connects to the RabbitMQ server and declares a queue for receiving messages.
Setting Up the Chat Application
The app that we're going to write will act both as a producer and a consumer.
First, we will create a Python class named ChatApp. This class will handle the connection to RabbitMQ, sending messages, and receiving messages. The class will use the pika library, which is Python implementation of the AMQP 0-9-1 protocol that RabbitMQ uses.
Here's the initial setup for our ChatApp class:
import json
import pika
import threading

class ChatApp:
    # RabbitMQ connection parameters
    RABBITMQ_HOST = 'localhost'
    RABBITMQ_PORT = 5672
    RABBITMQ_USERNAME = 'guest'
    RABBITMQ_PASSWORD = 'guest'

    def __init__(self, user_queue, partner_queue):
        self.user_queue = user_queue
        self.partner_queue = partner_queue

        self.credentials = pika.PlainCredentials(ChatApp.RABBITMQ_USERNAME, ChatApp.RABBITMQ_PASSWORD)
        self.connection = pika.BlockingConnection(pika.ConnectionParameters(host=ChatApp.RABBITMQ_HOST, port=ChatApp.RABBITMQ_PORT, credentials=self.credentials))
        self.receiver_thread = threading.Thread(target=self.start_receiver, args=(user_queue, )) # Create a thread for the receiver

        self.receiver_thread.start() # Start the thread
In the above code, we have defined the RabbitMQ connection parameters and initialized the ChatApp class with user_queue and partner_queue. The user_queue is the name of the queue where the user will receive messages, and the partner_queue is the name of the queue where the user will send messages.
Receiving Messages
Now, let's define how our application will receive messages. We will create a new thread that listens for incoming messages and prints them to the console. This is done in the start_receiver method:
def start_receiver(self, queue_name):
    def callback(ch, method, properties, body):
        self.clear_message(ch, method, properties, body)

    credentials = self.credentials
    connection = pika.BlockingConnection(pika.ConnectionParameters(host=ChatApp.RABBITMQ_HOST, port=ChatApp.RABBITMQ_PORT, credentials=credentials))

    self.channel = connection.channel()
    self.channel.queue_declare(queue=queue_name, durable=True)
    self.channel.basic_consume(queue=queue_name, on_message_callback=callback)

    print(f" [*]Waiting for messages in {queue_name}. To exit press CTRL+C")
    self.channel.start_consuming()
In the start_receiver method, we declare the queue and start consuming messages from it. Whenever a message is received, the callback function is called, which in turn calls the clear_message function.
The clear_message function prints the received message to the console and acknowledges the message to the broker. The broker will then delete the message from the queue.
def clear_message(self, channel, method, properties, body):
    print(f"Received message: {body.decode()}")
    channel.basic_ack(delivery_tag=method.delivery_tag)
Sending Messages
Next, let's define how our application will send messages. This is done in the send_message method:
def send_message(self, queue_name, message):
    channel = self.connection.channel()

    channel.queue_declare(queue=queue_name, durable=True)
    channel.basic_publish(exchange='', routing_key=queue_name, body=message)
    print(f" [x] Sent '{message}'")
In the send_message method, we declare the queue and publish a message to it. The message will then be delivered to all consumers that are subscribed to the queue.
❗The exchange parameter is an empty string, which means the default exchange is used. The routing_key is set to the queue name. In the default exchange, the routing key is the name of the queue to which the message should be delivered.
So, in this chat application, the default direct exchange is used. This works well for a simple chat application like this, where each message is sent directly to a specific queue. For more complex routing scenarios, you might choose to use a different type of exchange.
Simple Interface
Finally, let's create a simple interface for our chat application. We will ask the user for their queue name and the partner's queue name, and then start a chat session:
if __name__ == '__main__':
    queue_name = input('Enter queue name: ')
    partner_queue = input('Enter partner queue name: ')

    chat_app = ChatApp(queue_name, partner_queue)
    while True:
        message = input('Enter message: ')
        chat_app.send_message(partner_queue, message)
In this code, we create an instance of the ChatApp class and start a loop where the user can enter messages to send.
Full Code
'''
devoriales.com
https://devoriales.com/post/249

This is the second part of the tutorial on how to create a chat application with Python and RabbitMQ.
In the first part, we created a simple chat application that allowed users to send messages to a queue.
In this part, we will create a chat application that allows users to send messages to each other.

'''

# chat_app.py
import json
import pika
import threading


class ChatApp:
    # RabbitMQ connection parameters
    RABBITMQ_HOST = 'localhost'
    RABBITMQ_PORT = 5672
    RABBITMQ_USERNAME = 'guest'
    RABBITMQ_PASSWORD = 'guest'

    def __init__(self, user_queue, partner_queue):
        self.user_queue = user_queue
        self.partner_queue = partner_queue

        self.credentials = pika.PlainCredentials(ChatApp.RABBITMQ_USERNAME, ChatApp.RABBITMQ_PASSWORD)
        self.connection = pika.BlockingConnection(pika.ConnectionParameters(host=ChatApp.RABBITMQ_HOST, port=ChatApp.RABBITMQ_PORT, credentials=self.credentials))
        self.receiver_thread = threading.Thread(target=self.start_receiver, args=(user_queue, )) # Create a thread for the receiver

        self.receiver_thread.start() # Start the thread


    def clear_message(self, channel, method, properties, body):
        '''
        This function is called when a message is received by the consumer.
        It prints the message to the console and acknowledges the message to the broker.
        The broker will delete the message from the queue.
        :param channel:
        :param method:
        :param properties:
        :param body:
        :return:
        '''
        print(f"Received message: {body.decode()}")
        channel.basic_ack(delivery_tag=method.delivery_tag)


    def start_receiver(self, queue_name):
        print('start_receiver')
        '''
        This function starts a consumer that listens to the queue and calls the on_message function when a message is received.
        It blocks the main thread, so it should be run in a separate thread.
        :param queue_name:
        :return:
        '''
        def callback(ch, method, properties, body):
            print('callback')
            '''
            This function is called when a message is received by the consumer.
            The parameters are passed by the Pika library, not from the code.
            :param ch:
            :param method:
            :param properties:
            :param body:
            :return:
            '''
            self.clear_message(ch, method, properties, body)

        # set credentials
        credentials = self.credentials

        # set connection for
        connection = pika.BlockingConnection(pika.ConnectionParameters(host=ChatApp.RABBITMQ_HOST, port=ChatApp.RABBITMQ_PORT, credentials=credentials))

        self.channel = connection.channel()

        self.channel.queue_declare(queue=queue_name, durable=True)
        self.channel.basic_consume(queue=queue_name, on_message_callback=callback)

        print(f" [*] Waiting for messages in {queue_name}. To exit press CTRL+C")
        self.channel.start_consuming()

    def send_message(self, queue_name, message):
        print('send_message')
        channel = self.connection.channel()

        channel.queue_declare(queue=queue_name, durable=True)
        channel.basic_publish(exchange='', routing_key=queue_name, body=message)
        print(f" [x] Sent '{message}'")


if __name__ == '__main__':

    queue_name = input('Enter queue name: ')
    partner_queue = input('Enter partner queue name: ')

    chat_app = ChatApp(queue_name, partner_queue)
    while True:
        message = input('Enter message: ')
        chat_app.send_message(partner_queue, message)
Result
Let's illustrate how the chat application might work in a terminal. For this example, let's assume we have two users, Jeanne and Pierre, each running a separate instance of the chat application.
- Create two files with the same code, example:
chat_app_1.pyandchat_app_2.py - Start the RabbitMQ docker container if you haven't already:
docker run -d --name rabbitmq -p 5672:5672 -p 15672:15672 rabbitmq:management - Open two terminals and start each app like in the example:
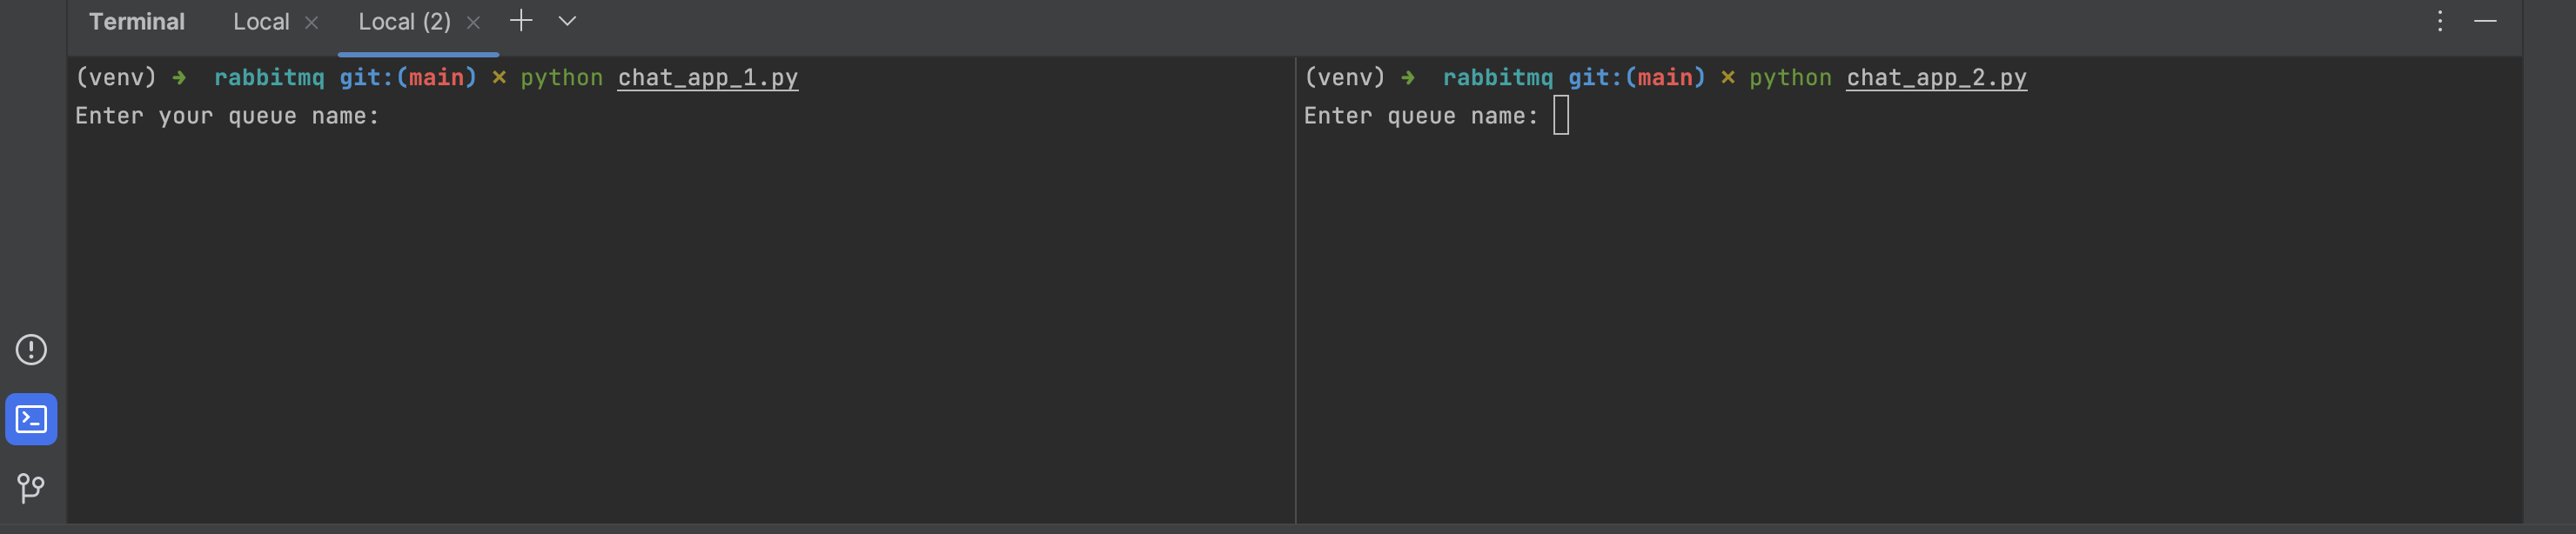
Terminal 1 - chat_app_1.py
Enter queue name: jean_queue
Enter partner queue name: pierre_queue
Enter message: Hi Pierre, how are you?
 [x] Sent 'Hi Pierre, how are you?'
Terminal 2 - chat_app_2.py
Enter queue name: pierre_queue
Enter partner queue name: jean_queue
 [*] Waiting for messages in pierre_queue. To exit press CTRL+C
Received message: Hi Pierre, how are you?
Enter message: Hi Jean, I'm good. Thanks for asking!
 [x] Sent 'Hi Jean, I'm good. Thanks for asking!'
Terminal 1 - chat_app_1.py
Received message: Hi Jean, I'm good. Thanks for asking!
Enter message: Great to hear, Pierre! Have a nice day.
 [x] Sent 'Great to hear, Pierre! Have a nice day.'
Terminal 2 - chat_app_2.py
Enter queue name: pierre_queue
Enter partner queue name: jean_queue
 [*] Waiting for messages in pierre_queue. To exit press CTRL+C
Received message: Hi Pierre, how are you?
Enter message: Hi Jean, I'm good. Thanks for asking!
 [x] Sent 'Hi Jean, I'm good. Thanks for asking!'
Terminate one app
In this example, we will shut down the instance in Terminal 2 which is the Pierre's queue. This will simulate that one of the services is down, while messages are sent to it.
Terminal 1 - chat_app_1.py
Enter message: Hi Pierre, how are you?
 [x] Sent 'Hi Pierre, how are you?'

Enter message: Hope you are doing well.
 [x] Sent 'Hope you are doing well.'

Enter message: Let's catch up soon.
 [x] Sent 'Let's catch up soon.'
Now, Pierre's application comes back online. When Pierre's application starts up again, it connects to the RabbitMQ broker and starts consuming messages from Pierre's queue. The messages that Jean sent while Pierre was offline are delivered to Pierre's application.
Terminal 2 - chat_app_2.py
Enter queue name: pierre_queue
Enter partner queue name: jean_queue
 [*] Waiting for messages in pierre_queue. To exit press CTRL+C

Received message: Hi Pierre, how are you?
Received message: Hope you are doing well.
Received message: Let's catch up soon.
As you can see, even though Pierre's application was offline when Jean sent the messages, Pierre was able to receive all of them when his application came back online. This is because RabbitMQ stored the messages in Pierre's queue until Pierre was ready to consume them. This feature of RabbitMQ is called message durability, and it's one of the reasons why RabbitMQ is a popular choice for building reliable messaging systems.
Summary
In this tutorial, we've explored the fundamentals of RabbitMQ, a message broker that is a key enabler of asynchronous communication in a microservices architecture. We've learned about RabbitMQ's core features, such as message queuing, publish/subscribe models, routing and routing keys, message acknowledgment, and more.
We've also examined the variety of protocols supported by RabbitMQ, including AMQP 0-9-1, AMQP 1.0, STOMP, MQTT, HTTP, and WebSockets, while focusing on using the Python library Pika that primarily utilizes AMQP 0-9-1.
The tutorial provided step-by-step instructions on setting up RabbitMQ with Docker, which is a prerequisite to follow along. For readers who want to try it out, remember you need Python 3.11, Pika, Docker daemon, and the RabbitMQ:management container image installed.
Through understanding RabbitMQ's working mechanism, the concept of exchanges, and bindings, we have set a solid foundation for creating applications that can communicate effectively and reliably, even under challenging scenarios. This knowledge will be particularly useful as we explore the creation of a simple chat application in a future tutorial.
By integrating RabbitMQ into your Python applications, you'll be well-equipped to handle the complexities of communication in distributed systems, ensuring your data is processed without failures, regardless of system load or service availability.
References
AMQP 0-9-1 Model: https://www.rabbitmq.com/tutorials/amqp-concepts.html
About the Author
Aleksandro Matejic, a Cloud Architect, began working in the IT industry over 21 years ago as a technical specialist, right after his studies. Since then, he has worked in various companies and industries in various system engineer and IT architect roles. He currently works on designing Cloud solutions, Kubernetes, and other DevOps technologies.
In his spare time, Aleksandro works on different development projects such as developing devoriales.com, a blog and learning platform launching in 2022/2023. In addition, he likes to read and write technical articles about software development and DevOps methods and tools.
You can contact Aleksandro by visiting his LinkedIn Profile